참고
설치
npx sb init --builder webpack5
적용
설명
- 스토리북은 컴포넌트와 페이지를 고립화시켜 개발 및 테스트, 문서화 할 수 있는 도구
- 아래 예시는 컴포넌트 위주로 설명
- 컴포넌트 개발단계에서 개발+테스트+문서화하는 방법으로 스토리북에 들어가는 추가 공수를 줄이고자 함
파일 생성
- 예시: CustomInput.tsx 컴포넌트를 기준으로 생성
import { CustomInput } from "../../../../components/common/atoms/CustomInput";
export default {
component: CustomInput,
};
템플릿 생성
- 해당 컴포넌트에 대한 각각의 스토리에서 공통적으로 사용할 코드 + args 맵핑
const Template = args => {
  const [value, setValue] = useState();

  const handleOnChange = newValue => {
    setValue(newValue);
  };

  return (
    <CustomInput
      id={"customInputStroy"}
      value={value}
      onChange={handleOnChange}
      {...args}
    />
  );
};
- 템플릿을 여러개를 만들어서 사용 가능
- 아래처럼 해당 컴포넌트를 사용하는 특정 환경을 지정하여 사용할 수도 있다.
const GridTemplate = args => {
  const [value, setValue] = useState();

  const handleOnChange = text => {
    setValue(text);
  };

  return (
    <Grid container spacing={5}>
      <CustomInput
        id={"firstGridItem"}
        value={"입력불가"}
        readOnly={true}
        onChange={() => {}}
        regularBreakpoints={{ xs: 2 }}
      />
      <CustomInput
        id={"customInputStroy"}
        value={value}
        onChange={handleOnChange}
        {...args}
      />
      <CustomInput
        id={"thirdGridItem"}
        value={"입력불가"}
        readOnly={true}
        onChange={() => {}}
        regularBreakpoints={{ xs: 2 }}
      />
    </Grid>
  );
};
스토리 작성
기본
- 위에서 만든 템플릿 + args를 추가하여 스토리를 작성
// 기본 템플릿 바인딩하여 사용
export const Standard = Template.bind({});
Standard.args = {
formControl: { variant: "standard" },
};
export const Outlined = Template.bind({});
Outlined.args = {
formControl: { variant: "outlined" },
};
export const Filled = Template.bind({});
Filled.args = {
formControl: { variant: "filled" },
};
export const GridItem = GridTemplate.bind({});
GridItem.args = {
regularBreakpoints: { xs: 3 },
};
기존 스토리 조합
- 앞서 작성한 스토리들을 이용하여 새로운 스토리 생성가능
export const ComplexStory = () => (
  <>
    <Standard {...Standard.args} />
    <Outlined {...Outlined.args} />
    <Filled {...Filled.args} />
  </>
);
기존 스토리의 args 사용
- 앞서 작성한 스토리의 args만 떼와서 새로운 스토리의 args 구성 가능
export const CombineMulitStory = Template.bind({});
CombineMulitStory.args = {
  ...Outlined.args,
  ...Label.args,
  ...HelperText.args,
  ...MultiLine.args,
};
다른 컴포넌트의 스토리를 import하여 사용
import { LabelAndHelperText } from "./CustomSelect.stories";
export const ImportOtherStoryArgs = Template.bind({});
ImportOtherStoryArgs.args = {
...LabelAndHelperText.args,
};
decorators 적용
- 해당 컴포넌트의 모든 스토리에 적용할 수 있는 환경 설정 가능
export default {
component: CustomInput,
decorators: [
Story => (
<div style={{ margin: "3em" }}>
<Story />
</div>
),
],
};
전역 args 설정
- 해당 컴포넌트의 모든 스토리에 적용할 수 있는 args 설정 가능
export default {
  component: CustomInput,
  args: { // 생략가능
    placeholder: '아무거나 입력하세요'
  }
};
실행
npm run storybook- 포트번호는 package.json 참고
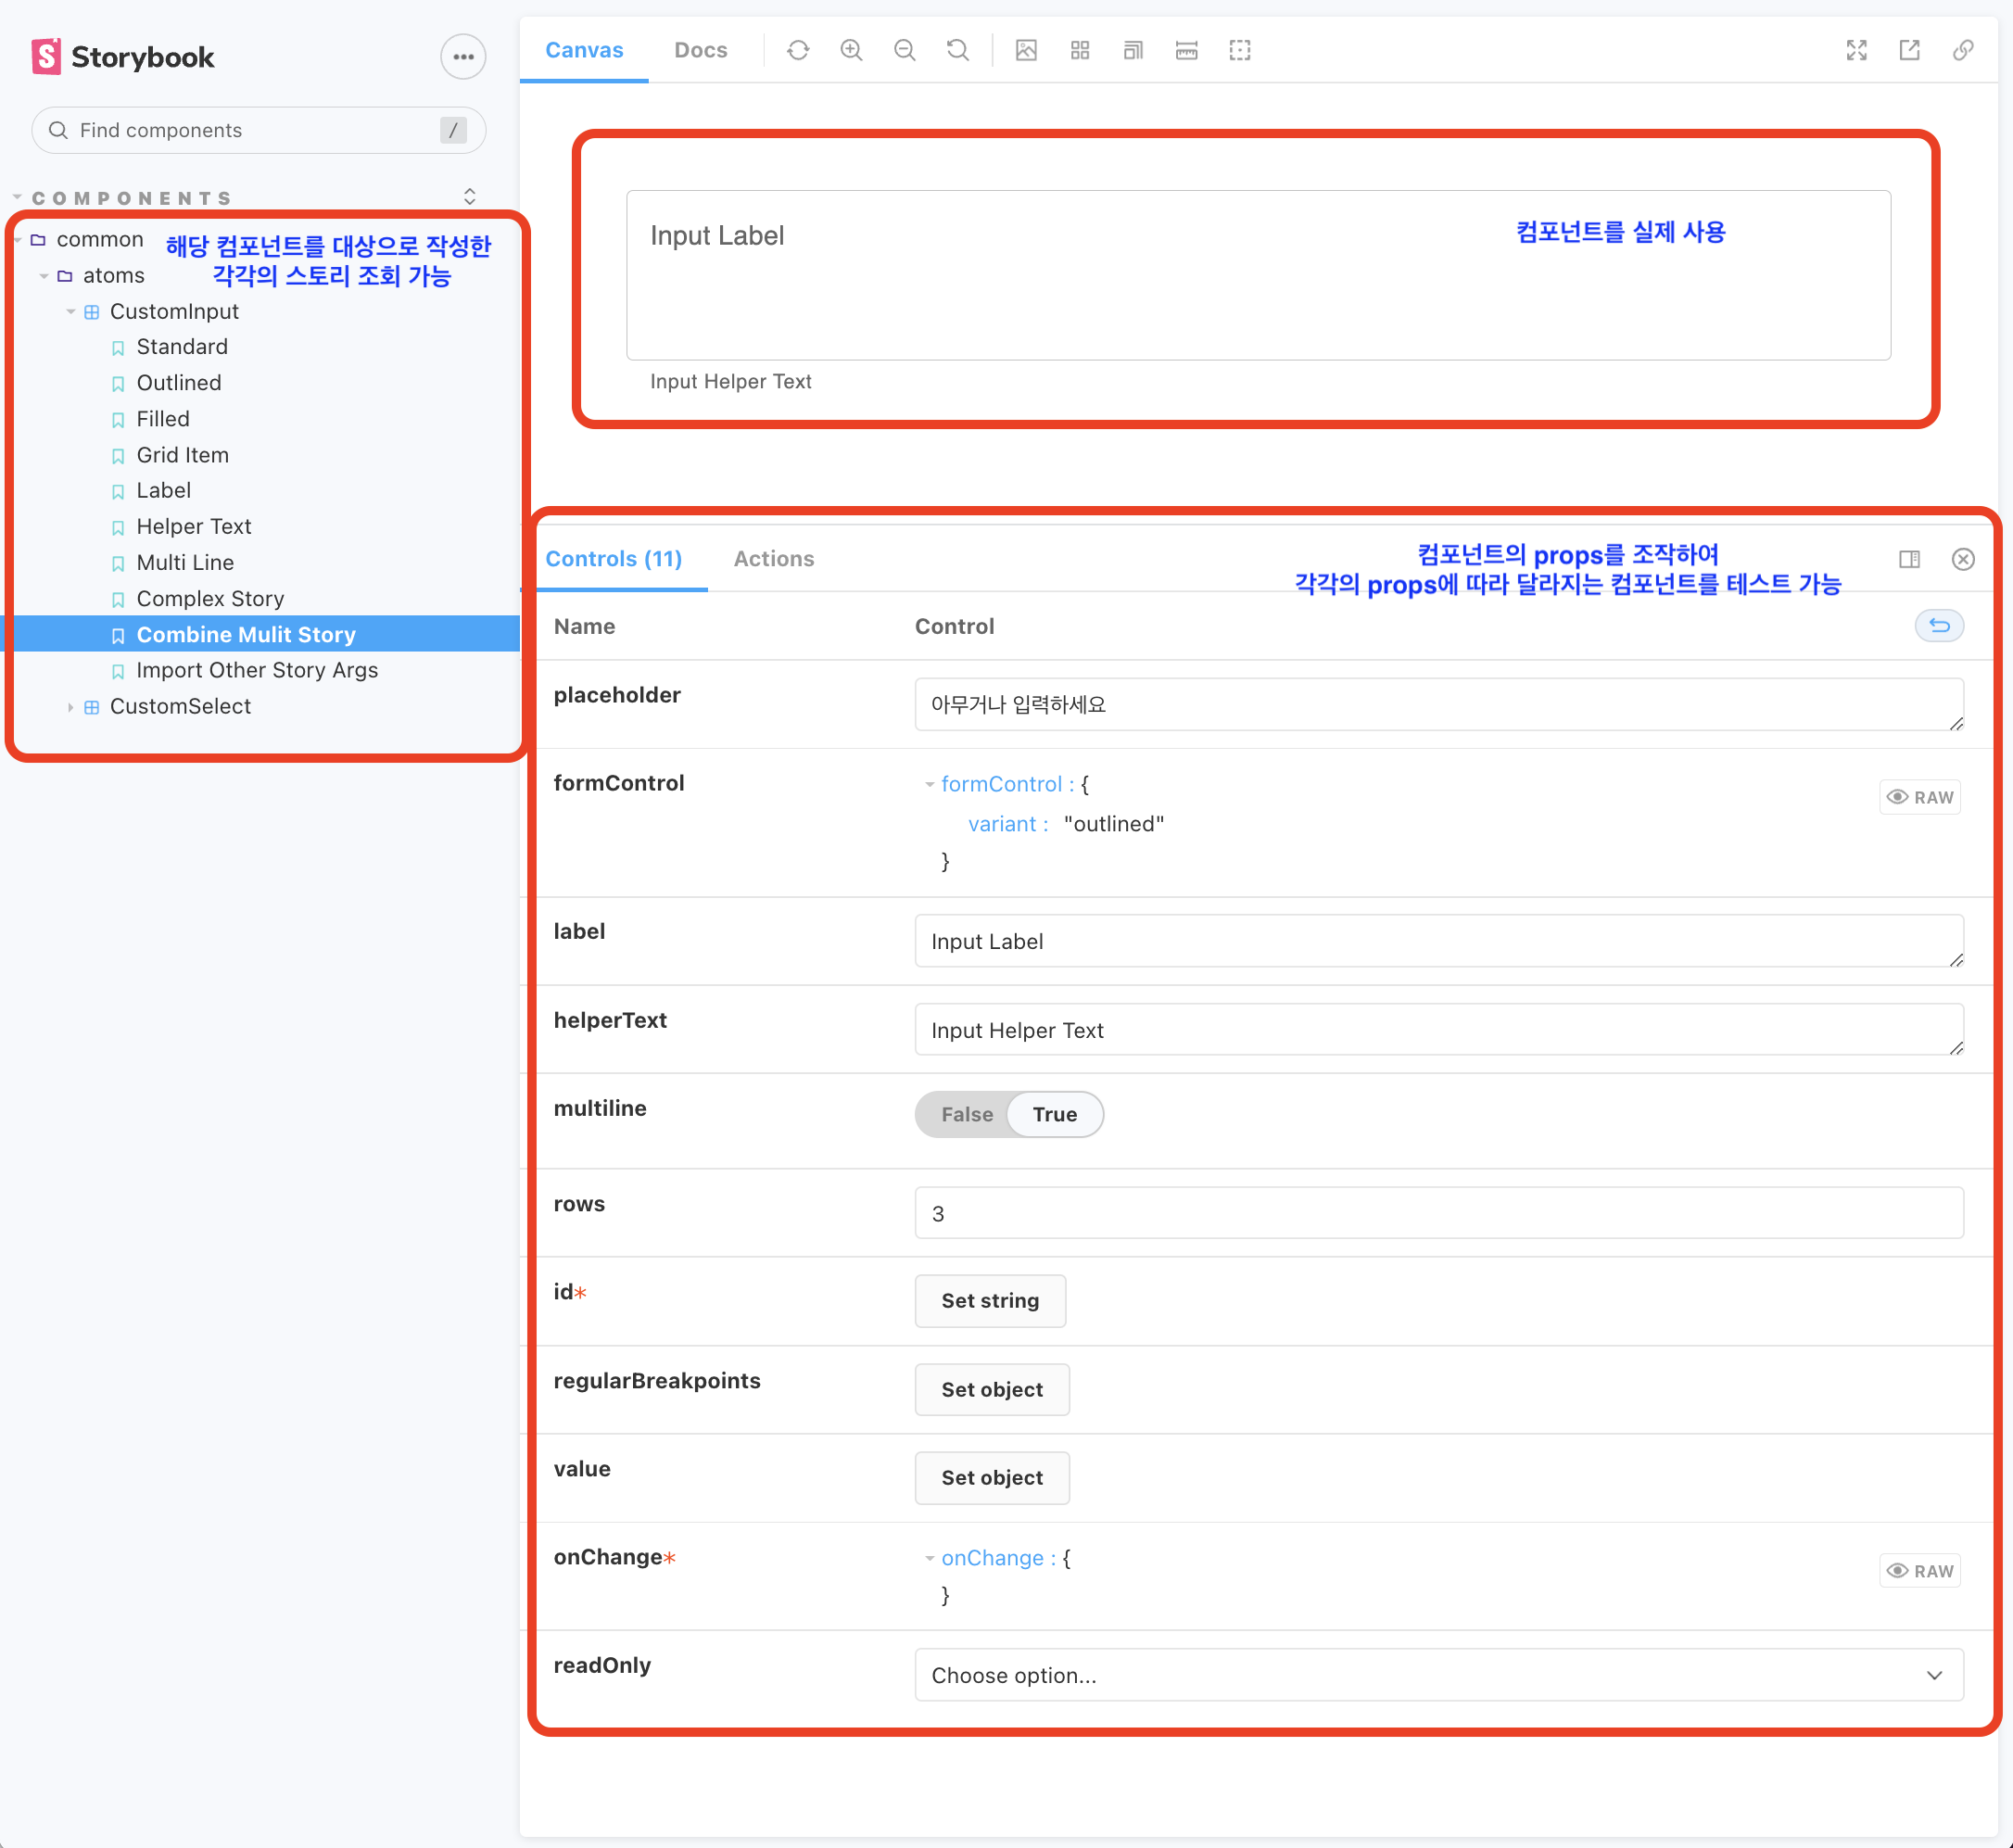
- 아래 이미지처럼 브라우저에서 args(props)를 조작하며 개발, 조회, 테스트 가능

